
Are you looking to make your beer experience even better? Learning how to hard pour a beer is an essential skill for any craft or imported beer lover. The perfect pour requires practice and attention to detail, but once mastered it can take your drinking pleasure up a notch.
In this blog post we will cover the types of pours available, what needs to be done in preparation for pouring a beer, the steps involved in achieving that perfect pour, tips on avoiding common mistakes when pouring and finally how best clean up afterwards. So if you’re ready let’s dive into learning about hard pouring beers!
Table of Contents:
- Types of Beer Pours
- Preparing to Pour a Beer
- Steps for Pouring a Perfect Beer
- Tips for Avoiding Common Mistakes When Pouring Beer
- Cleaning Up After Pouring a Beer
- FAQs in Relation to How to Hard Pour a Beer
- Conclusion
Types of Beer Pours

Draft beer is one of the most popular types of beer pours. Draft beer is served from a keg or cask, and it can be tapped directly into a glass or mug. The advantage of draft beer is that it has more flavor than bottled or canned beers because the ingredients are fresher and have not been exposed to light for an extended period of time.
Additionally, draft beers tend to be cheaper than other types of pours due to lower overhead costs associated with serving them. However, draft beers do require special equipment such as taps and kegs which can be expensive and difficult to maintain over time.
Bottle beer is another type of pour that has become increasingly popular in recent years. Bottle beers are typically sold in 12-ounce bottles or larger containers such as growlers or crowlers. The advantage of bottle beer is that it offers greater variety since many craft breweries only offer their products in bottles rather than cans or on tap.
Additionally, bottle beers tend to have better shelf life since they are sealed tightly and protected from light exposure which helps preserve the flavor longer than other types of pours. On the downside, bottle beers can be more expensive due to packaging costs associated with bottling them individually instead of by volume like cans or kegs would allow for.
On the downside, cans may cost slightly more per unit compared with some bottled varieties but generally remain cheaper overall when purchased in bulk quantities due to reduced packaging costs associated with mass production runs done by commercial breweries.
Preparing to Pour a Beer
When preparing to pour a beer, there are several steps that should be taken in order to ensure the best possible experience.
1. Choose the right glassware
Different types of beers require different glasses in order to properly showcase their unique flavors and aromas. For example, a stout or porter should be served in a pint glass while an IPA or wheat beer should be served in a tulip-shaped glass. It’s important to choose the correct type of glass for each style of beer so that you can enjoy its full flavor profile and aroma.
2. Clean and sanitize all equipment
The next step is cleaning and sanitizing all equipment used for pouring beer such as taps, spouts, hoses, and kegs. This ensures that no bacteria or other contaminants will get into your beer during the pouring process which could ruin it completely. Cleaning supplies specifically designed for use with alcohol should always be used when cleaning these items since regular dish soap may not remove all traces of bacteria from them.
3. Make sure your beer is chilled properly
Beer stored at room temperature will have lost some of its carbonation by the time it reaches your guests’ glasses which can result in flat tasting brews instead of ones with nice foamy heads on top like they’re supposed to have! Chilling your beers ahead of time helps keep them cold until they reach their destination without sacrificing any flavor or fizziness along the way!
Safety protocols should always be followed when handling alcohol; never drink directly from taps or bottles/cans, as this can lead to contamination issues if not done correctly.
Proper preparation is key to pouring the perfect beer. Now that you have chosen the right glassware, cleaned and sanitized your equipment, and chilled your beer properly, it’s time to learn how to pour a beer like a pro.
Steps for Pouring a Perfect Beer
Pouring a perfect beer is an art form that requires practice and skill. To get the most out of your beer, it’s important to understand how to properly pour it. Here are some steps for pouring a perfect beer:
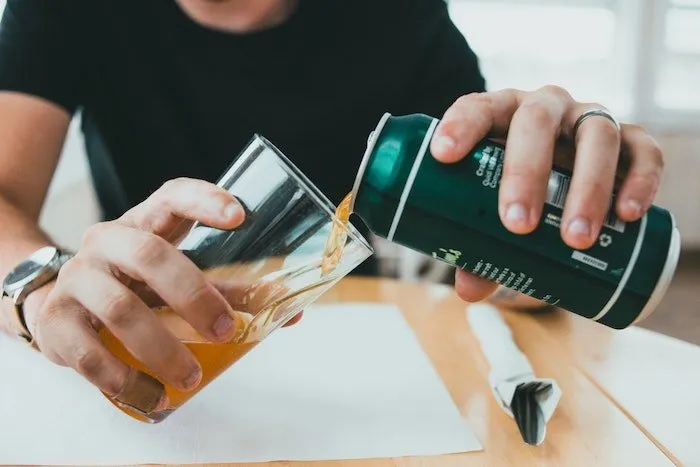
- Tilting the Glass at an Angle: When pouring your beer, you should always tilt the glass at an angle. This will help reduce foam and ensure that all of the flavor from your beer comes through in each sip. Start by holding the glass at about 45 degrees and then slowly lower it as you pour until it’s almost vertical when finished.
- Opening the Tap or Bottle/Can: Once you have tilted your glass correctly, open up either a tap or bottle/can depending on what type of beer you’re serving. If using a tap, make sure to open it quickly but not too quickly so as not to cause any splashing or spilling. For bottles and cans, be sure to hold them upright while opening them so that no foam escapes before being poured into the glass.
- Controlling The Flow Of The Pour: As you begin pouring your beer into the tilted glass, try to keep control over its flow rate by adjusting how much pressure is applied with each pour stroke. Too little pressure can lead to excessive foaming while too much can result in overflowing or spillage which would be wasteful! Aim for a steady stream of liquid coming out of whatever vessel you’re using – this will help create an even head on top of your drink without wasting any precious drops!
- Finally, avoid common mistakes when pouring such as not tilting enough or too much; opening taps/bottles/cans too slowly or quickly; and not allowing enough time for foam to settle before serving.
Tips for Avoiding Common Mistakes When Pouring Beer
When pouring beer, it’s important to avoid common mistakes in order to ensure that each pour is perfect every time.
- Not tilting the glass enough or too much can lead to an uneven pour and a flat-tasting beer. To achieve the perfect head of foam on top of your beer, tilt the glass at a 45 degree angle before you start pouring. This will allow for more carbonation and a better tasting drink overall.
- Not opening the tap or bottle/can quickly enough or too quickly can also affect the taste of your beer. If opened too slowly, not enough pressure will be released from inside the container and you won’t get as much flavor out of your brew. On the other hand, if opened too quickly, excessive amounts of foam may form due to overcarbonation which could ruin your pour altogether. The best way to open either type of container is with one smooth motion that releases just enough pressure without creating excess foam.
- Finally, it is important not to rush when pouring beer. Allowing some time for any excess foam created during tapping or opening a bottle/can should settle before serving so that you do not end up with an overly foamy drink in front of you. A good rule of thumb is waiting about 30 seconds after tapping or opening before starting your pour – this gives ample time for any extra bubbles created by releasing pressure from within containers dissipate while still keeping all those delicious flavors intact.
Cleaning Up After Pouring a Beer
After pouring a beer, it is important to properly clean up and store equipment in order to maintain hygiene standards. Disposing of leftover foam and sediment should be the first step. Any remaining foam or sediment can be scraped into the sink with a rubber spatula or spoon before washing the glassware. It is also important to wash all other equipment used for pouring, such as taps, bottle openers, and jiggers.
Washing these items with warm soapy water will help remove any residue from previous pours. After washing, all equipment should be sanitized using either an approved cleaning solution or by boiling them in hot water for several minutes.
Storing equipment properly after each use is essential for maintaining hygiene standards and ensuring that everything remains in good condition over time. All washed and sanitized items should be stored away from direct sunlight on shelves or racks that are easy to access when needed again.
Additionally, all metal parts should be dried thoroughly before storing them away to prevent rusting or corrosion due to moisture buildup over time.
By following proper cleaning procedures after each pour of beer, you can ensure that your glasses remain clean and hygienic while preserving the quality of your brewing supplies over time.
FAQs in Relation to How to Hard Pour a Beer
What does it mean to hard pour?
Hard pouring is a technique used when serving beer. It involves pouring the beer into a glass at an angle and then quickly straightening it up to create a foamy head on top of the beer. This helps to release carbon dioxide from the beer, creating more flavor and aroma for drinkers to enjoy. Hard pouring also helps to reduce waste by ensuring that all of the liquid in the bottle or can is poured out evenly, leaving no excess behind. Additionally, hard pouring can help keep sediment from entering your glass if you are drinking unfiltered beers like some craft brews.
Is it better to hard pour beer?
The answer to this question depends on personal preference. Hard pouring beer can help reduce foam and ensure that the entire bottle is poured into a glass, but it can also lead to over-carbonation of the beer and an overly bitter taste. On the other hand, gentle pouring allows for more control over how much carbonation is released and helps preserve some of the flavor notes in certain beers. Ultimately, it’s up to you as a consumer to decide which method works best for your own tastes.
What is the correct way to pour a beer?
The correct way to pour a beer is to hold the glass at an angle of 45 degrees and slowly tilt it upright as you pour. Make sure the bottle is held about 8-10 inches away from the glass, so that the beer can foam up properly. Pour until two thirds full, then straighten out your arm and fill it all the way to create a nice head on top. Take care not to overfill or splash too much foam onto your countertop! Finally, enjoy your perfectly poured beer!
How do you pour beer without it foaming?
Pouring beer without foaming is a skill that can be acquired with practice. To start, hold the glass at an angle and pour slowly from a distance of about 6 inches away. As the glass starts to fill up, tilt it back upright and continue pouring until it’s full. If you do this correctly, the foam should not exceed 1/2 inch above the rim of the glass. Additionally, make sure your beer is cold when pouring as warm beer will create more foam than cold beer. Lastly, use clean glasses for each pour to avoid any additional foam caused by residue or dirt on the inside of your glassware.
Conclusion
Knowing what type of pour you’re aiming for, preparing properly, and following the steps outlined above will help ensure that your beer is poured perfectly every time. With practice and patience, you’ll soon become an expert at hard pouring a beer!
Are you a craft beer enthusiast looking for the perfect pour? Whether it’s your first time trying to hard pour a beer or if you just need some tips on how to improve, we have all the resources and advice that can help. From learning about different types of beers, reviewing equipment options for pouring beer at home, subscribing to quality brew services or even making your own – let us show you how!
With our helpful blog posts and guides tailored specifically towards craft brewing enthusiasts like yourself, now is the best time ever to become an expert in creating your favorite drinks. So what are you waiting for? Let’s get started today!